
A 3D printed lithophane night light makes a great gifts. They are easy to personalize plus they’re genuinely useful as night lights.
lithophane Software
Night Light Hardware
Early versions
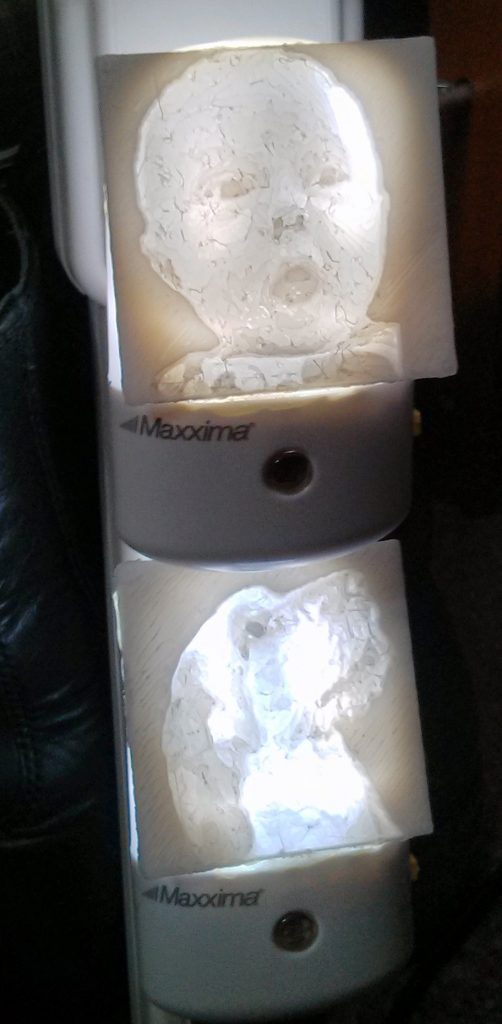
The biggest issue is finding a mass produced night light that is easy to interface with a flat 3D printed lithophane. My first attempt used this night light. It required dremeling a flat plane in the diffuser, where i later glue in the flat lithophane. This ended up being a lot of labor and it created a many defects in the finished product from glue drips to gaps from overcarving. Still it turned out nice enough that i continued exploring the idea.

Next was using these night lights which have a slab of clear acrylic that acts as a light pipe. This meant no dremeling, but instead i have to sand down the surface of the acrylic so that instead of totally internally reflecting the light, the scuffed up surface will scatter it through the lithophane. This design was much better, but i still have a few issues. The first is that the rectangular lithophane overhangs the curved edge of the acrylic, leaving a sharp exposed edge. The second issue is that the lithophane isn’t evenly lit. The LEDs are only at the bottom, leaving it too bright and the edges too dim.
A better solution
An hour or so or searching online i find these night lights which are just what i’m looking for. They have a flat diffuser, they are bright, come in 2 color temperatures and they are inexpensive.
I realized it would be nice to be able to switch whether the light turns off during the day or stays on 24/7. This night light also looks a bit unfinished so i figured i could 3D print a sleeve which slides over the back of the night light. This cleans up the profile of the light and it allows for a slider which can cover the photocell. The photocell is actually one drawback of this night light. It contains trace amounts of cadmium which RoHS bans. Now that i decided to add a sleeve that would have a very little clearance to the surfaces on the back of the night light, i needed to 3D model the night light as-is.
Next i need to 3d model the sleeve which will slip around the existing body of the night light. This sleeve has a few design requirements:
- slider
- 3D printable
- clean look
Problems….
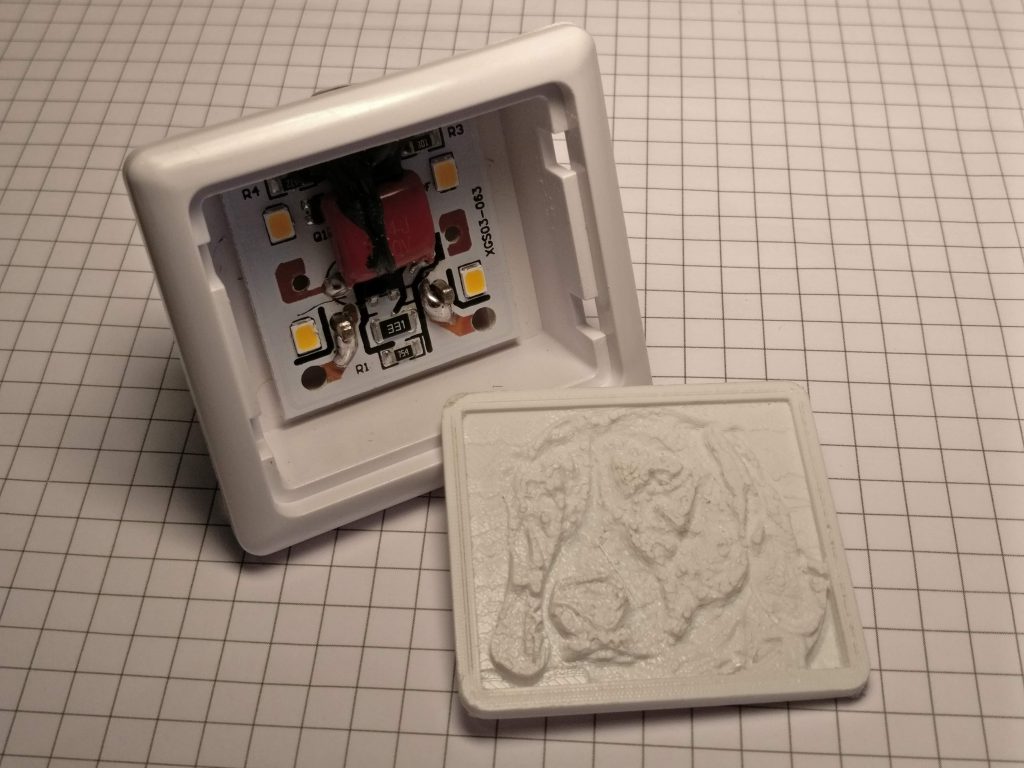
It was at this point that i realized a huge problem with this night light. The lithophane is backlit by four LEDS with about a half inch of open air in between to allow the light to even out. This gap means the lithophane has to fully support itself. Whats worse is that the lithophane is the only thing between the mains voltage inside and the person plugging it in. That might be ok if the lithophane were thick enough, but because each one is custom it will has a random thickness profile and thus random strength. Theres just no way i could trust something like that.
So just like that all that work was for nothing. At least i learned how to make time lapses.
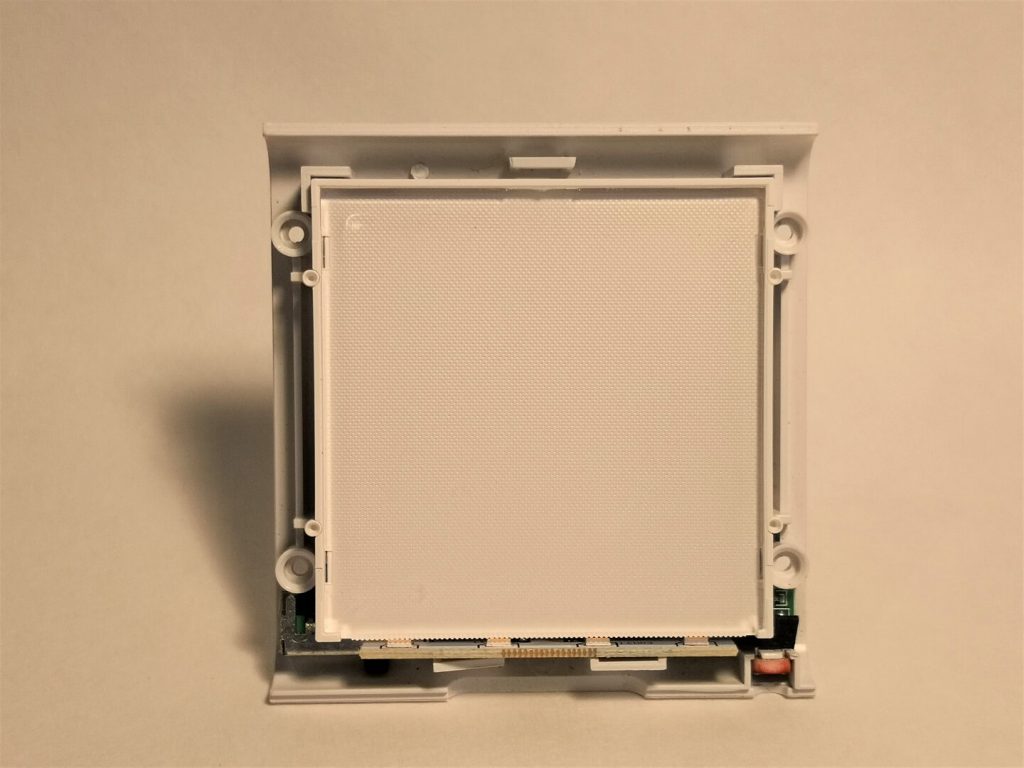
Yet another couple hours spent scouring the internet for night lights, and i think i finally found the one! These MAZTEK night lights illuminate the diffuser using a flat acrylic light pipe instead of open air. This means no matter the design of the lithophane there will be a thick slab of plastic between the user and the electronics.
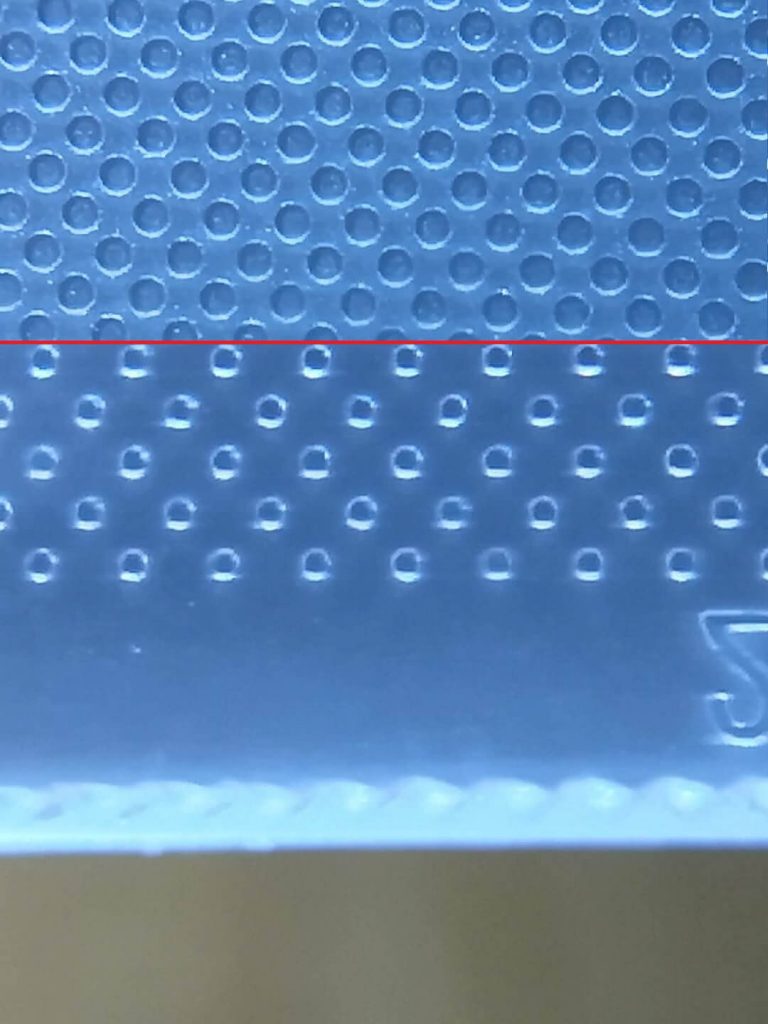
The other really cool feature of these lights is the way they get the illumination to be uniform while also only using 4 LEDs along the bottom edge. Those LEDs face an edge that has been scalloped to effectively create a series of cylindrical lenses. This begins to diffuse the light as it travels up the light pipe from bottom to top. Across the face of the slab are a pattern of dots etched into the light pipe. these dots scatter light out of the pipe and through the lithophane. The neat trick is how the dots are smaller at the bottom where the illumination is most intense, and larger at the top where the illumination is dimmer. This corrects for the natural drop in intensity caused by only illuminating the light pipe at the bottom.
to be continued….
Check out the source code or buy one here, thanks for reading.